Thursday, May 25, 2017
Impact!
As parents we usually don’t know the impact our kids have on others. It is not until they are gone from the environment they affect that we truly find out. When people, which as parent, I have little or no interaction with come up to me and ask, “Hey where is Grayson?” Reply with the same answer each time, “He has gone back to the States for the summer.” The expression on their face turns to one of disappointment or sadness. Apparently when Grayson goes out to play during his free time from school, he interacts with just about anyone he can find. There is not a single person on the housing compound that does not know Grayson. After seeing the expression on their faces I quickly reply, “He will back at the end of summer.” The expressions go from one of sadness to one of relief and then back to being happy. I don’t really know what kind of interaction Grayson has with the people he meets, but it is clear through my interactions with them, that he clearly has an impact and it is clear it is a good one that brings joy to another life. As a parent, I cannot be more proud of him. But it does make me question what impact I have on the people I meet? I can only hope that when I am gone people we have the same reverence for me as they do my son. I hope he never looses his ability to interact in a positive manner with the people he meets.
Thursday, March 3, 2016
Jennifer's Wildlife Challenge: Oman day 1
A few weeks back David posted this little picture of shells on his FB page.

Which led to this exchange:

Our niece Jennifer wants to see more wildlife pictures. I argued there isn't much wildlife here in the Arabian Desert. Since then I have been paying attention and noticing more and more wildlife. Turns out there is a lot of wildlife here. Not much big showy animals like the elephants, giraffes and hippos we saw in Africa, just the occasional camel or donkey. But there are lots of lizards, birds, crabs, and bugs. Little creatures you have to pay attention to notice, like those shells. The crab shell is about 3/4 of an inch across. So tiny but look at the patterns on it. Pretty cool.
I rarely post pictures on FB. I don't know why, I just don't. In fact I rarely post much of anything on FB. Mostly I just read what other people post and occasionally comment on something. I do miss blogging though. So Jennifer, here ya go, a brand new blog column inspired by you.
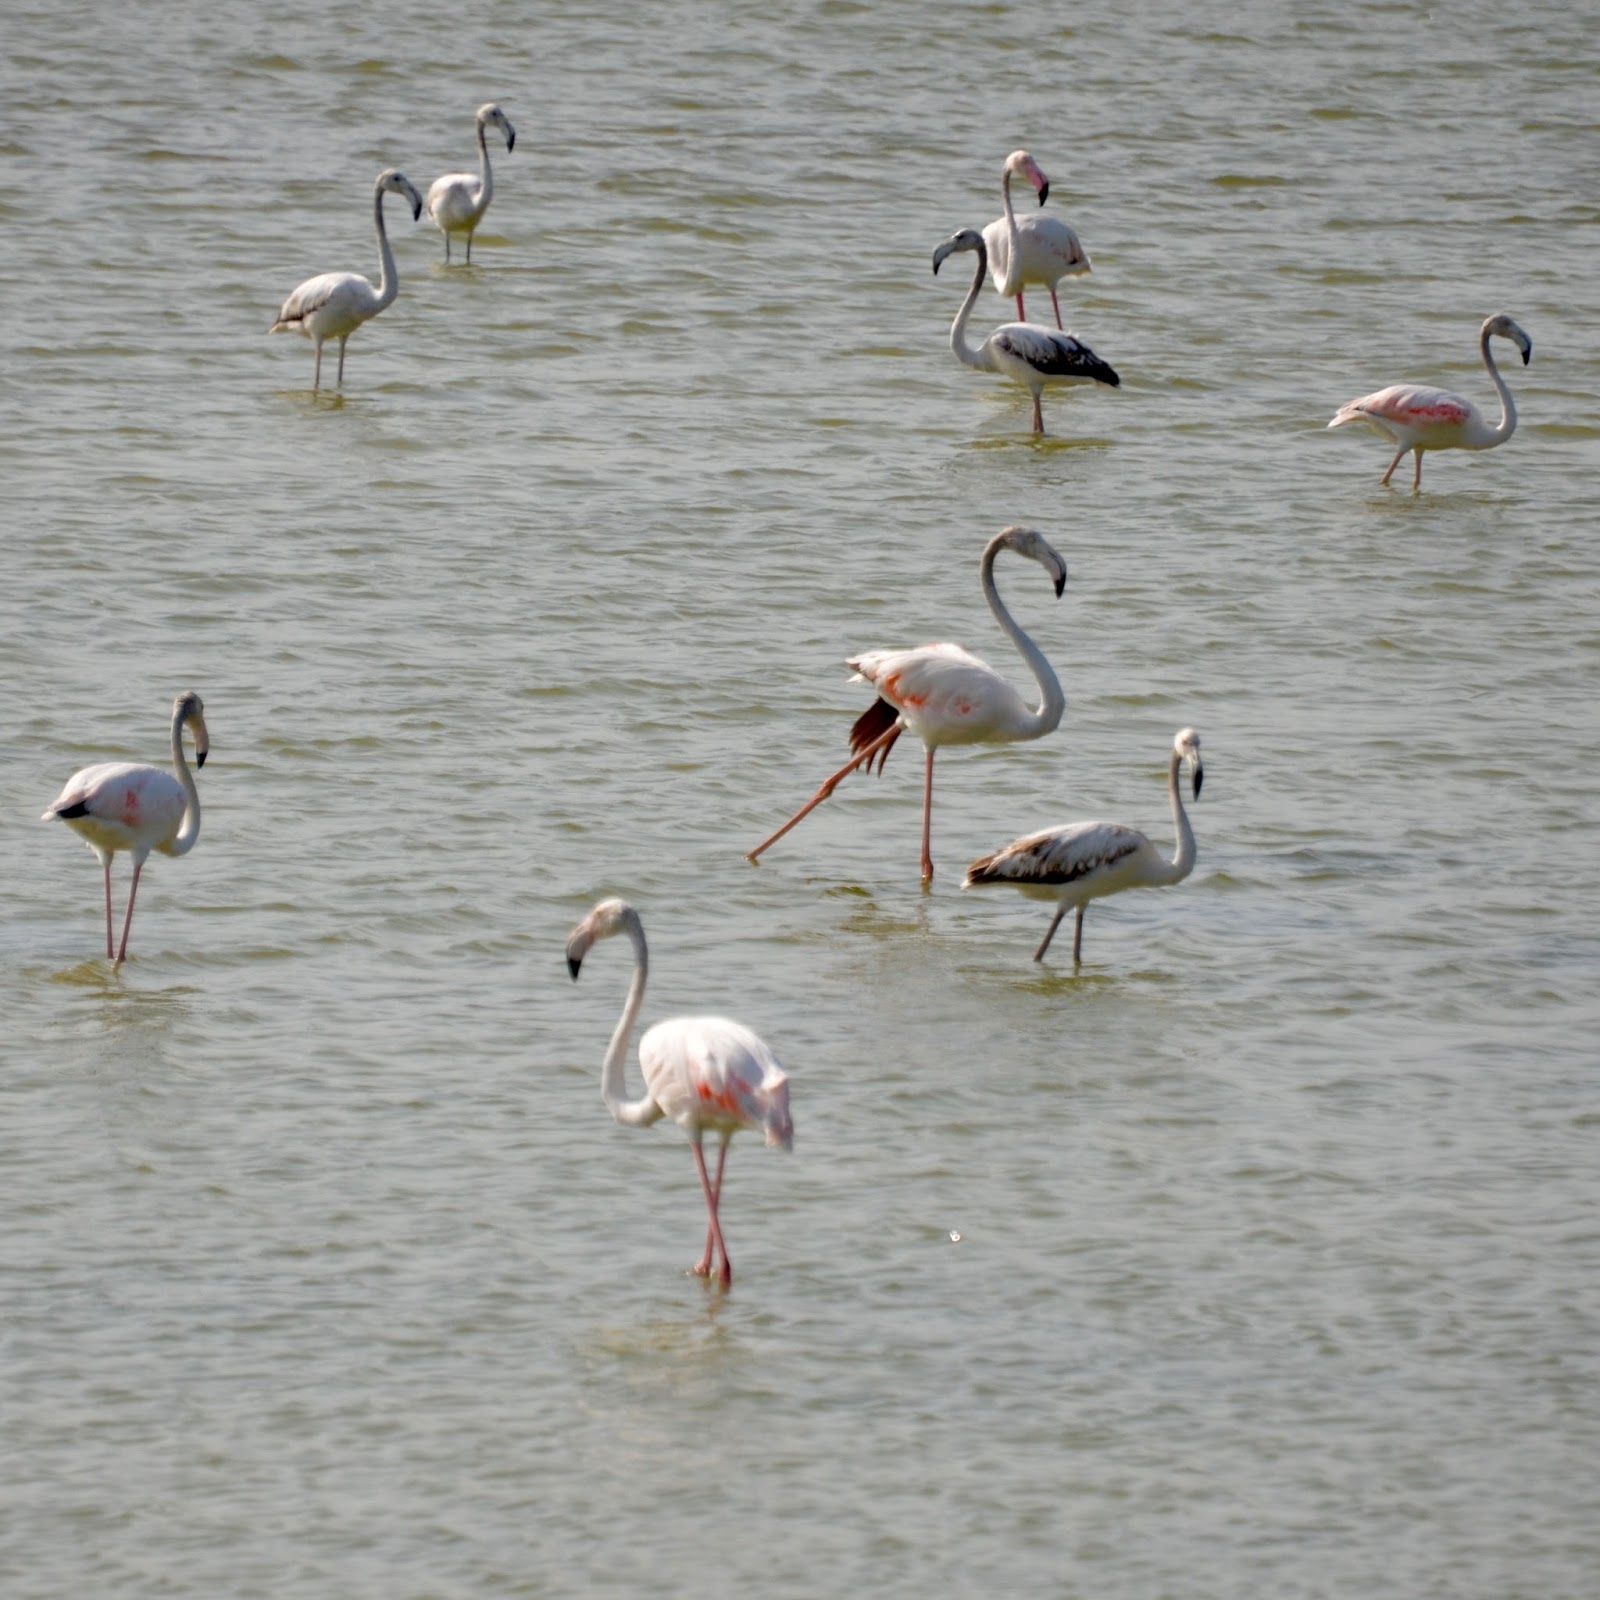
Day one. Flamingos! Spotted by Colin (of course) near the America's Cup Races last weekend. Pictures by your Uncle David.
 \
\


Our niece Jennifer wants to see more wildlife pictures. I argued there isn't much wildlife here in the Arabian Desert. Since then I have been paying attention and noticing more and more wildlife. Turns out there is a lot of wildlife here. Not much big showy animals like the elephants, giraffes and hippos we saw in Africa, just the occasional camel or donkey. But there are lots of lizards, birds, crabs, and bugs. Little creatures you have to pay attention to notice, like those shells. The crab shell is about 3/4 of an inch across. So tiny but look at the patterns on it. Pretty cool.
I rarely post pictures on FB. I don't know why, I just don't. In fact I rarely post much of anything on FB. Mostly I just read what other people post and occasionally comment on something. I do miss blogging though. So Jennifer, here ya go, a brand new blog column inspired by you.
Day one. Flamingos! Spotted by Colin (of course) near the America's Cup Races last weekend. Pictures by your Uncle David.
 \
\

Wednesday, November 18, 2015

Monday, November 9, 2015
Handshake
We have our handshake. In non-foreign service speak that means we found where we are headed next. No I'm not going to tell just you, that's too easy. If you can figure out which country's flag this is then you will know where we are going.

Monday, April 27, 2015
To David with Love
This post is dedicated to my awesome hubby. He bought us our house for our 15th anniversary, and then gave me the time by myself to go home and redo the kitchen, alone. He had faith I could pull it off even though I had never ever done anything like that before. Thanks Honey!! (Also he has been nagging me for about 8 months to get a finished kitchen post up on the blog. Here ya go Babe, one long awaited blog post.)
Today I was looking through all the pics of our little house in the 'hood that I took last summer. Oh, how I miss my little house. Don't get me wrong I love all our adventures living overseas, but just as much I love having a place that is unequivocally MINE. A place that is quietly waiting for me to come home, unlock the doors, throw open the windows, and breath life back into it. With summer coming up soon my little house has been on my mind a lot lately.
Last summer I went back well ahead of the kids and Dave to give the kitchen a facelift and make it the house just a little more ours. I blogged the early stages of the renovation but once Dave and the boys caught up with me in Texas I sorta quit blogging. Ooops! Sorry about that.
I did eventually finish the kitchen, or more accurately I finished painting and put the cabinet doors back on then David showed up and put the finishing touches on the kitchen. Little things like lighting, new shelves, and door handles.
A quick review since I haven't blogged in forever. Here's the kitchen as it was when we bought the house.


There was nothing essentially wrong with the kitchen. The cabinets were in reasonable decent shape. The appliances are old but still in good working conditions. I described it as builder grade ugly. Boring cabinets, no door handles, cheap light fixtures. Just blah.
I decided I could fix builder grade ugly with a little paint and creativity because Pinterest! Dave and made arrangements for me to head home without him or the boys. For the first time in 22 years I found myself on my own without kids. For a while I wondered what I had gotten myself into. Most of May and into June the house looked like this.


Dave added door handles, crown molding and a pretty new school house style light over the kitchen sink. The brown thing next to the fridge is my antique 4-drawer card catalog that I use to store tea. One of my favorite things, ever! Eventually we'll replace the sink with a white porcelain sink, the refrigerator with a counter depth European style (tall and narrow) fridge, the dishwasher with a Bosch and add under cabinet lighting. I still have no idea what to do about that fluorescent light. It's practical and gives off lots of light, but it's kinda ugly. I'll figure it out eventually.
On the other side of the room you can see the glass shelves Dave added under the cabinets. I use the open shelving for the stuff I use everyday: Plates, glasses, coffee and coffee cups, spices for cooking. The stuff I use less frequently is hidden away in the cabinets safe from dust. I think moving the cabinets to the ceiling and eliminating the dust-collecting, wasted foot of space above them was the best idea I've had in a long time. The kitchen works so much better now.
Today I was looking through all the pics of our little house in the 'hood that I took last summer. Oh, how I miss my little house. Don't get me wrong I love all our adventures living overseas, but just as much I love having a place that is unequivocally MINE. A place that is quietly waiting for me to come home, unlock the doors, throw open the windows, and breath life back into it. With summer coming up soon my little house has been on my mind a lot lately.
Last summer I went back well ahead of the kids and Dave to give the kitchen a facelift and make it the house just a little more ours. I blogged the early stages of the renovation but once Dave and the boys caught up with me in Texas I sorta quit blogging. Ooops! Sorry about that.
I did eventually finish the kitchen, or more accurately I finished painting and put the cabinet doors back on then David showed up and put the finishing touches on the kitchen. Little things like lighting, new shelves, and door handles.
A quick review since I haven't blogged in forever. Here's the kitchen as it was when we bought the house.
There was nothing essentially wrong with the kitchen. The cabinets were in reasonable decent shape. The appliances are old but still in good working conditions. I described it as builder grade ugly. Boring cabinets, no door handles, cheap light fixtures. Just blah.
I decided I could fix builder grade ugly with a little paint and creativity because Pinterest! Dave and made arrangements for me to head home without him or the boys. For the first time in 22 years I found myself on my own without kids. For a while I wondered what I had gotten myself into. Most of May and into June the house looked like this.
The kitchen was torn apart and pretty much unusable, the dining room and living room became a makeshift painting studio for all the cabinet and drawer fronts. I really thought that I had made a dreadful mistake and was never going to get this finished. I kept working at it because what else was I going to do? Then all at once it began to come together. By the time Dave and the kids arrived it looked pretty much like this.
Not bad, better than it was, but not exactly what I had in mind. David put his skills to work and took care of all the finishing touches needed to finally pull it all together.
Now our kitchen looks amazing. It's hard to believe it is the same kitchen. It's really all paint and illusion. There are no new appliances, no new cabinets, no new granite countertops, but it looks and feels brand-new and amazing. I can't wait to be home cooking in my pretty new kitchen this summer.
Drum Roll Please! Here is the grand bloggy unveiling of our new and improved kitchen.
 |
| The sink side as viewed from back door. It shows perhaps the most important part of the kitchen, the coffee station. |
 |
| Same side viewed from the other direction. |
 |
| Stove side viewed from the back door. |
You can also see wine rack above the stove. I couldn't move that cabinet because it has the plugs for the microwave inside it. I had originally ordered a wine rack I thought would fit that space off the internet. When Dave saw it, he threw it out and went to work with a jig saw and created this. Amazing! I couldn't be happier.
So my big reveal is nearly a year late. At least I got it up before I flew home for this summer. I really don't have any big home reno projects lined up for this year. It's more an assortment of small projects. Nothing very exciting, although for me just going to the hardware store and then doing it, what ever it is, all by myself without waiting for GSO to get around to it is excitement enough!
 |
| Both sides at once and my gorgeous carpet runner Dave brought back from Oman. |
 |
| View from dining room table, and the only views that shows my tiny pantry across from the fridge and the back door. |
Tuesday, April 21, 2015
A Quilt for Colin
Now that I have made a few baby quilts for friends with babies my boys are beginning to make noises about a quilt for someone in our house. I have never made a full sized quilt. I made a Dakota's bedding when he was little. He's in the Navy now so that's been a while. Last spring I pieced my first baby quilt in more than twenty years. I have never made a full sized quilt. Here goes nothing, GULP!
I am starting with a jelly roll quilt for Colin. I LOVE precuts mostly because I hate the rotary cutter, or maybe it hates me. I don't know which, but I do know have ruined a lot of fabric with a sudden slip of that thing. I'm still learning, but I still have all my fingers, so I'm not doing too badly.
Once I found fabric Colin liked I started on a Pinterest frenzy looking for an idea that clicked. A few hours/days/weeks later this is what I found as my inspiration.
It's the Cascade quilt pattern from Robert Kaufman Fabric. I already have the fabric so I'm not ordering a kit. It looks pretty straight forward though.
The next step for me was to try and lay out the fabric to see if I was going to like it.
I do not like the stripes. DO. NOT. LIKE. Also those angled joins are going to give me fits, I just know it. On the other hand I am feeling much better about Colin's choice of blue for the contrast fabric. His rational was blue is opposite of orange on the color wheel. Pretty smart kid, it really works well. I had been thinking black, which I now think would have been too harsh of a contrast.
Quick note: the contrast fabric is the brighter blue under the lighter strips on the left of the picture. The rest of what you are seeing is the back side of a quilt the boys have had since Colin was 3 or 4. It just happens to be very close in color to the background color so I am using it to play with layouts. That also explains the blue and green triangles, they aren't part of the design, just part of an old dinosaur quilt.
Next try. More randomness, less stripes, no tricky angles.
Better, so much better. Not sure that I like the dark to light gradation though.
Attempt number three. Getting tired of crawling around on the floor, so I hope this one works.
This is my favorite so far. I'll show this post to Colin tonight and see what he thinks. I hope he picks this one. Oh, and Colin? I'm not sewing that top striped one. No way, no how!
Now I need to go remake the bed I stole the quilt from before the kids get home. Let me know which one you like best and have a great day.
Monday, March 30, 2015
Playing with Half-Square Triangles
I am working on a new baby blanket. I love the fabrics, all bright colors and Eric Carle prints from the Very Hungry Caterpillar. The half square triangles that are the basis of the quilt are fun to play with. I ended up spending a good 45 minutes flipping them this way and that to see the different patterns formed by the white and the bright colors. All the different patterns were made by simply rotating easy square where it lay. None of the blocks have been switched or moved to a different spot. It is amazing how different each variation looks.
My Original plan:

How about zig zags? I think Marshmallow approves. Oh, if I haven't mentioned it before we adopted a pair of half grown street cat kittens. Meet Marshmallow, he is "helping" me this morning.


My Original plan:
How about zig zags? I think Marshmallow approves. Oh, if I haven't mentioned it before we adopted a pair of half grown street cat kittens. Meet Marshmallow, he is "helping" me this morning.
Stripes? This one turned out to be my least favorite.
Squares? I think I am leaning toward this one right now. Marshmallow approves. David suggested this one last night and I didn't like it then, so if I choose this one I will hear about it. Sigh.
The other kitten Orerow jumped in to help Marshmallow check out the quilt pattern. After their "help" a few square may have been moved around. (About his name, there was a mix up the the vet papers and Oreo became Orerow. Sounds like Scooby Doo trying to say Oreo.)
I like this pinwheel/hourglass pattern but I had such a hard time trying to lay it out that I think I will wait until I have a little more experience before trying this one. In this pic you can see the coordinating fabrics. The Hungry Caterpillar is the backing and the green numbers will be the edging.
This is the last variation I tried. I tried it two ways, one with a white center and one with a dark center. For some reason I like the dark center better.
I can't seem to make up my mind which I like the best. I may have to buy some more fabric and make more quilts just so I can try them all out. Darn.
Thursday, January 29, 2015
Project Updates January - I Have Fabric!
Let the crafting begin. YAY!

My favorite fabric company had a bunch of specials over the holidays and I spoiled myself by ordering a few things. Look at all the pretty colors.
If you look carefully you'll realize they are all tossed on top of the project in progress from a few months ago. That quilt top got sidelined while I waited for shipments, but everything to finish it has arrived and I am back on track. The top is finished, the quilt is sandwiched and basted and I am trying to decide how to quilt this one.
While I think about that, here's a closer look at the goodies I have received.

Some pretty pink and brown fabrics for the second little girls quilt I have planned. I can't wait to get started on this one. Both the pink quilts, this one and the one on the table underneath all the new fabric, will be going to the same family for their special little girls. I wanted them to be quite different from each other. I hope the girls love the soft Minky backings I choose. It feels like heaven so fluffy and warm, but I am a little freaked out about sewing it. The free motion foot I ordered arrived broken and in pieces. The walking foot is still MIA in the mail system. I hope when it does show up it's in better shape than the free motion foot. All the tutorials I have watched suggest using a walking foot for dealing with Minky and its tendency to creep and stretch. I may just have have to cross my fingers and give it a go with a regular presser foot.

These three charm pack were freebies. Two were ones I picked out with the quilters cash I collected for spending so much money, The third was the daily deal. I just got lucky that the colors for all three match almost perfectly. I have no idea yet what I am going to make with those, but I think it might be something just for me. I'll figure that one out later. I love free fabric. And spending hours daydreaming my way through Pinterest searching for ideas for new projects. Win Win.

If you look carefully at the picture above there are two Eric Carle prints from the book the Very Hungry Caterpillar and a matching charm pack. These are for little boy's baby quilt going to a dear freind. I love the bright happy colors. It should be fun to work up. That project is on the to-do the list right after the two pink quilts. Hopefully I'll have it done by the end of February, insha'Allah.

And finally these fabrics are for my own (not so) little munchkin who loves bugs and I-Spy books. I want to try a quilt as you go method for this one, but will have to wait for a new, and hopefully not broken, free motion foot to arrive before I can start on this one. I think I have enough to keep me busy until then.
What projects are you working on?
My favorite fabric company had a bunch of specials over the holidays and I spoiled myself by ordering a few things. Look at all the pretty colors.
If you look carefully you'll realize they are all tossed on top of the project in progress from a few months ago. That quilt top got sidelined while I waited for shipments, but everything to finish it has arrived and I am back on track. The top is finished, the quilt is sandwiched and basted and I am trying to decide how to quilt this one.
While I think about that, here's a closer look at the goodies I have received.
These three charm pack were freebies. Two were ones I picked out with the quilters cash I collected for spending so much money, The third was the daily deal. I just got lucky that the colors for all three match almost perfectly. I have no idea yet what I am going to make with those, but I think it might be something just for me. I'll figure that one out later. I love free fabric. And spending hours daydreaming my way through Pinterest searching for ideas for new projects. Win Win.
If you look carefully at the picture above there are two Eric Carle prints from the book the Very Hungry Caterpillar and a matching charm pack. These are for little boy's baby quilt going to a dear freind. I love the bright happy colors. It should be fun to work up. That project is on the to-do the list right after the two pink quilts. Hopefully I'll have it done by the end of February, insha'Allah.
What projects are you working on?
Wednesday, January 21, 2015
New Favorite Word of all Time
BUS! BUS!
Like magic all fights stop and, everyone scrambles to find what ever they didn't pack.
There are always things not packed even though Mom -that's me- spent at least 20 minutes last night interrogating various children, "Are you totally packed and ready for school? Are you sure? Do you have your PE kit? Flute/Euphonium/Recorder? Swim suit towel? Homework? iPad charged? BlahBlahBlahBlah...." Lots of eye rolling and "Yessssss Motheerrrrrr" in response. And still, every morning, the scramble.
BUS! BUS!
Looks of panic. Fights stopped mid sentence. 2 minutes of mad scramble. Blessed quiet. I can finally drink my coffee. Clean the mess left in the kitchen from 3 kids making breakfast and 1 dad making 3 lunches. Put my feet up and just enjoy a moment of peace.
BUS! BUS!
My new favorite word ever.
Sunday, December 21, 2014
Making Bread In a KitchenAid
This post is for my fabulous Sister-In-Law who just got a KitchenAid stand mixer. She knows I use my mixer to make bread all the time, so she asked for a how-to. I almost always use my KitchenAid to do the hard part of bread making. When you make all the bread your family eats for 3 years in while living in Africa, you will take what short-cuts modern technology can offer.
I let it mix for a good 3 or 4 minutes to get the gluten development going. In yeast breads gluten is what makes it all stretchy, and what you are trying to develop by kneading the dough. At this point it should be about the consistency of a cake batter.
At this point if you are going to need your mixer for something else transfer the dough to a greased bowl, turn the dough once to coat with oil, cover and let rise. If you aren't going to need the mixer again take a piece of plastic wrap, smear with a little butter or spray with a bit of Pam, cover your mixing bowl and let rise. Why make more dishes??
Now you can go back the recipe and follow the instructions as written to form the cinnamon rolls. Roll out the dough on a floured surface, smear with butter, sprinkle with sugar and cinnamon, slice and put in the pan. You should end up with something like this. Cover with a bit of buttered (or sprayed with Pam) plastic wrap and pop in the fridge overnight.
In the morning pull the rolls out of the fridge, they will have risen slightly overnight, but will still need to rise for about 30 minutes or so. Since the dough is cold you can put it in the oven with the light on, that will give just enough warmth to bring the dough back to life. Or you can just stick them on top of the range while the oven preheats. Either way. Just be sure to take the rolls out of the oven BEFORE you preheat the oven. It's a bit irritating to ruin everything at this point by baking the rolls with plastic wrap still on them. Trust me. While the rolls are rising you can go ahead and enjoy your coffee since you did all the hard work last night.
Bake the rolls 25 minutes or so. They will be lovely and golden brown.
Actually my rolls should be slightly browner. I was making them for a brunch later in the morning and was going to be reheating them, so I pulled them out about 5 minutes early. I forgot to take a picture after I reheated them and they were browned the rest of the way.
I am making overnight cinnamon rolls using this recipe I found on Pinterest. It's a nice basic sweet roll recipe. You can use this technique with pretty much any bread recipe, as long as isn't too much dough for your mixer.
 |
| See how it is all bubbly and foamy? Live yeast! |
With any bread recipe I always start by proofing the yeast. This just means checking to see if the yeast is alive. Mix the yeast with a bit of warm water and a pinch of sugar. Let it sit for about 10 minutes. If the yeast is alive it will foam up. If nothing happens, throw it out, buy new yeast and try again.
 |
| Batter paddle doing its thing. |
Since I am using my KitchenAid at this point I begin ignoring the instructions as written and do my own thing. I dump in all the milk, sugar, eggs, butter, salt, egg, and 2 cups of flour. Basically everything but half of the flour. Using the batter paddle I let the machine mix everything up for me. You do want to make sure that any liquid ingredients are warm, not hot. Think about the temp of a baby bottle. You don't want to kill all that lovely yeast.
Now it is time to switch to the hook and add the rest of the flour. At first it will look shaggy and rough but after a few minutes, it will begin to look smooth and start to pull away from the sides. If if doesn't pull away you can add a little extra flour a couple of tablespoons at a time. When the dough is kneaded enough it will be almost shiny and not so sticky any more.
 |
| The dough starts of a bit shaggy. |
 |
| 5 minutes later and all done. Notice how it has pulled from the sides a bit. |
 |
| Covered dough waiting to rise. |
 |
| A bit over an hour later and the dough is all risen. |
 |
| I cut it into 16 rolls instead of 12. Sorry it's blurry, at some point I put a buttery finger on the lens. Sigh! |
In the morning pull the rolls out of the fridge, they will have risen slightly overnight, but will still need to rise for about 30 minutes or so. Since the dough is cold you can put it in the oven with the light on, that will give just enough warmth to bring the dough back to life. Or you can just stick them on top of the range while the oven preheats. Either way. Just be sure to take the rolls out of the oven BEFORE you preheat the oven. It's a bit irritating to ruin everything at this point by baking the rolls with plastic wrap still on them. Trust me. While the rolls are rising you can go ahead and enjoy your coffee since you did all the hard work last night.
 |
| Risen and ready to bake. |
 |
| Yum! |
Time to make the frosting, just follow the recipe. Use the whisk attachment to make the frosting. I use the whisk for frosting, whipped cream, whipping egg whites, and making marshmallows. Not much else. You can make the frosting ahead and store covered in the fridge so that the morning is easy-peasy, and nothing interferes with the coffee.
 |
| Frosting, so much frosting. |
The cream cheese frosting recipe that is included with the recipe makes an awesome frosting but it made a heck of a lot. I used what I needed and tossed the rest in a ziploc and froze it until next time.
Hints:
1. If you are doing a larger recipe you can still use the KitchenAid until it is time to switch to the bread hook, then finish up by hand. It will make kneading go a lot faster.
2. If you don't want to do this recipe as an overnight don't put the rolls in the fridge, just let rise and bake.
3. If you are going to reheat the rolls like I did cover them with tin foil until warmed through then uncover just long enough to brown.
Teri - If I left anything out, or you have any questions Leave a comment. Good luck!
Monday, November 17, 2014
Project Update November
I have been working on several different crafty projects, and really enjoying myself, but I haven't taken the time to blog about it. Surprised? Yeah, I didn't think so.
The piecing on the small half square triangle quilt is finished. The fabric for the border and backing has arrived. As soon as I remember to order a quilting foot for my machine I will get the final assembly done. Yes, I am machine quilting this one.

For my new fabric I decided to go with the Disappearing Hourglass pattern after all. I really like the stars in the blocks, and I could make them with 10 inch precuts, which is handy because that is what I have. I decided to not use a solid paired with a print to make each block like the directions suggest, but then when have I ever followed directions the way they are written? I decided to use only "batik" printed fabric. Whoever decided to call this stuff batik has never served at a post in Indonesia or Africa. It's pretty, but it is NOT batik.


Some day I am going to have a dedicated craft room where I can set things up and leave them and not have to hurry up and clear everything away in time to serve dinner.
The piecing process has not been without mistakes. I guess that is to be expected when you are trying to teach yourself a new skill from youtube videos. I have ruined one square beyond help so I threw that piece into my scrap bag, maybe someday I can find a use for it. Other squares I have been able to rescue by picking out my mistakes and trying again. I'm getting a lot of practice at picking out my mistakes. I usually spot them before I am finished with a square, but sometimes I don't see them until I am laying things out to take a picture. Like this mistake. Three of these things belong together, three of these things are kinda the same….can you spot the one that is different?

Hint: bottom left. My mistake actually makes a pretty cool quilt square on its own, but it doesn't match the other squares. Of course it is the middle section that I messed up on. Lots of picking out on that one, but it is all back together and looking the way it should.
The kids want to get in on the sewing machine action. I'm not about to let them touch the quilt blocks, but I have a bunch of Christmas fabric I ordered the day after Christmas to make gift bags for this Christmas. Wrapping paper can be hard to find overseas, and my little tree huggers aren't too happy about trees being murdered for pretty holiday paper. So we are slowly moving to reusable cloth bags to wrap presents in. The gift bag idea was just the ticket. Colin got the privilege of sewing the first bag. Very basic straight-line stitching but I am sure we will be using it for years to come.

The piecing on the small half square triangle quilt is finished. The fabric for the border and backing has arrived. As soon as I remember to order a quilting foot for my machine I will get the final assembly done. Yes, I am machine quilting this one.
For my new fabric I decided to go with the Disappearing Hourglass pattern after all. I really like the stars in the blocks, and I could make them with 10 inch precuts, which is handy because that is what I have. I decided to not use a solid paired with a print to make each block like the directions suggest, but then when have I ever followed directions the way they are written? I decided to use only "batik" printed fabric. Whoever decided to call this stuff batik has never served at a post in Indonesia or Africa. It's pretty, but it is NOT batik.
I wasn't sure it would work, but I am pretty happy with how it is turning out so far. I like the way the marbly colors swirl and flow into each other. Trying to match up the colors took some time, for a few days my living room floor looked like this, with me periodically switching fabrics around until I was happy with all the pairings.
Some day I am going to have a dedicated craft room where I can set things up and leave them and not have to hurry up and clear everything away in time to serve dinner.
The piecing process has not been without mistakes. I guess that is to be expected when you are trying to teach yourself a new skill from youtube videos. I have ruined one square beyond help so I threw that piece into my scrap bag, maybe someday I can find a use for it. Other squares I have been able to rescue by picking out my mistakes and trying again. I'm getting a lot of practice at picking out my mistakes. I usually spot them before I am finished with a square, but sometimes I don't see them until I am laying things out to take a picture. Like this mistake. Three of these things belong together, three of these things are kinda the same….can you spot the one that is different?
Hint: bottom left. My mistake actually makes a pretty cool quilt square on its own, but it doesn't match the other squares. Of course it is the middle section that I messed up on. Lots of picking out on that one, but it is all back together and looking the way it should.
The kids want to get in on the sewing machine action. I'm not about to let them touch the quilt blocks, but I have a bunch of Christmas fabric I ordered the day after Christmas to make gift bags for this Christmas. Wrapping paper can be hard to find overseas, and my little tree huggers aren't too happy about trees being murdered for pretty holiday paper. So we are slowly moving to reusable cloth bags to wrap presents in. The gift bag idea was just the ticket. Colin got the privilege of sewing the first bag. Very basic straight-line stitching but I am sure we will be using it for years to come.
Subscribe to:
Posts (Atom)